Well, Well, Well
Written by: Melissa Hurtado
Last week, I spent my Wednesday lowering a GoPro taped to a stick down a well in a dark basement. Oh you know, just casual archaeology things.
Imagine you buy a home and you find an old well in your basement. Who do you call to investigate it? Lucky for us, a homeowner in Beacon Hill decided to call the City of Boston Archaeology Program for us to survey their well.
I’ll take you through the process of how archaeologists survey a well and the necessary steps to accurately document it.
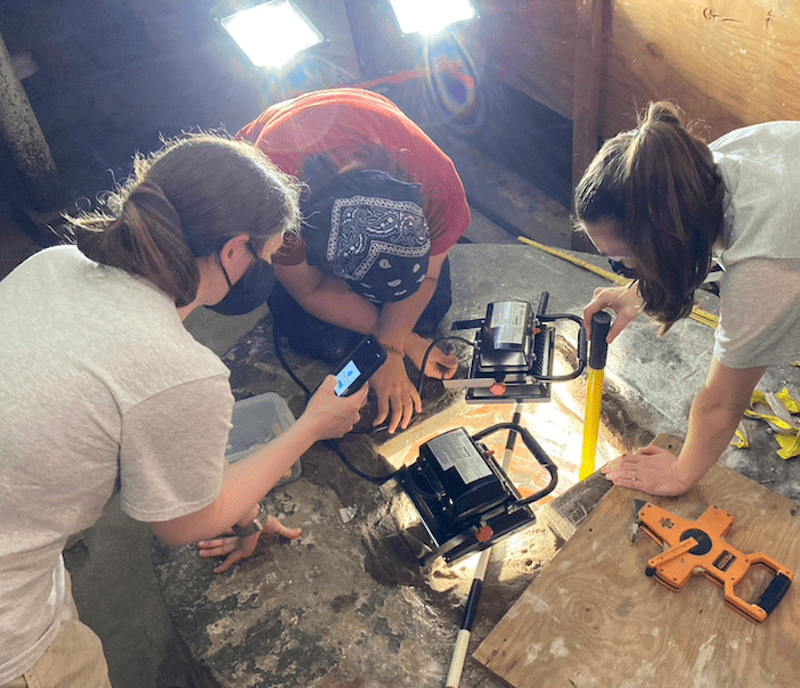
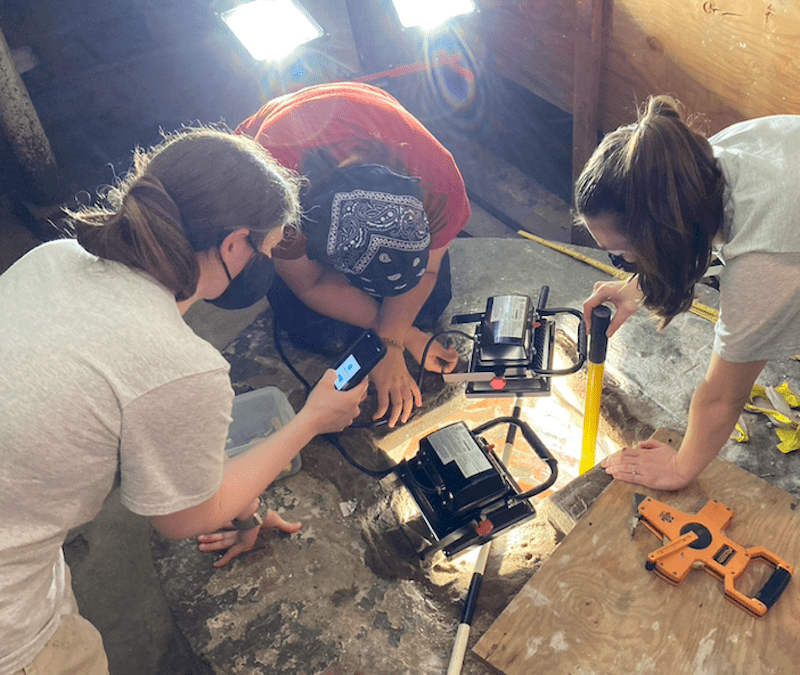
First things first, archaeology is all about teamwork so we decided to go as a team. We all met up at the corner of Boston Common and carried the necessary materials for the survey. When we arrived at the scene, the homeowner welcomed us and led us to their basement. We immediately started getting to work. The well was nailed shut with a wooden board. It took a hammer and some people power and we were finally able to open it. We took a look inside and the first things we noticed were the clear water, some pipes, and two old lightbulbs (not yet dated). Before taking any pictures or measurements, we started setting up the lights, meter stick, and measuring tape. Our lab manager, Sarah, was the designated data collector so she started to get her notebook ready to take down measurements and detailed notes on the condition of the well. Finally, we were set up to start collecting data.
Left to right: Joe, Nadia, Sarah, Lauryn, Melissa.
It’s important for archaeologists to collect the measurements of the well for future references, investigations, and long term documentation. It was quite simple to take the dimensions of the well. Joe, the city archaeologist, read out the measurements of the width, length, height, depth, length of openings, etc… Many of these corresponded with different parts of the well, for example, the height from the floor or from the first pipe inside the well to the top. As Joe read them out loud, Sarah collected the dimensions, and Nadia, Lauryn, and I helped with lighting and positioning. After we collected detailed notes about the well, we were ready to take pictures of the inside of the well, both for documentation and for 3D photogrammetry.
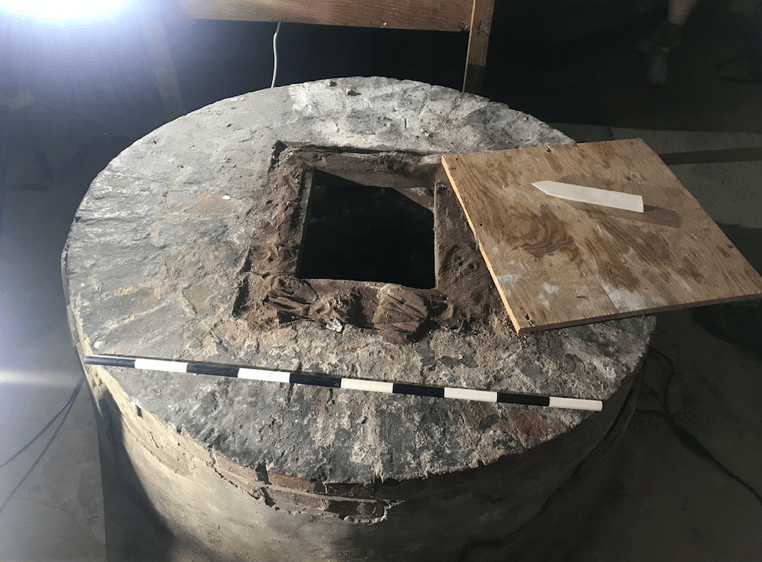
This is where we get to the part about lowering a GoPro down a well. Archaeologists can make online 3D models of a feature, room, or object by taking pictures of the area or object from multiple angels and inputting the photos into a computer program that creates a model from the photos taken. 3D models in archaeology are useful for a variety of reasons, one of those being for objects that may be too fragile to showcase to the public or other archaeologists and therefore, an online or real life 3D model can allow the public and others to study the object without risk of damaging it. Another reason is for long term documentation, for example, if the homeowner decided to get rid of the well or if something happened to it, there is now a permanent online record of what the well looked like. Check out a similar 3D model on Sketchfab of an old well in the UK.
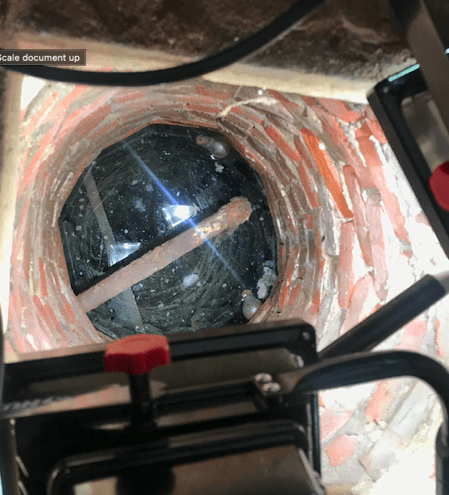
Our next step was to take a waterproof GoPro, attach it to a paint roller extension cord, lower it down the well, and take a video to see what the inside of the well looked like. In addition to the video, Nadia took methodical pictures of the well to later create a 3D model of it. The video allowed us to see what the inside looked like more closely. Namely, we were able to see where the pipes came out of the rocks and began to wonder if the pipes were built during the construction of the well or after, which could potentially give us insight into what the pipes were used for.
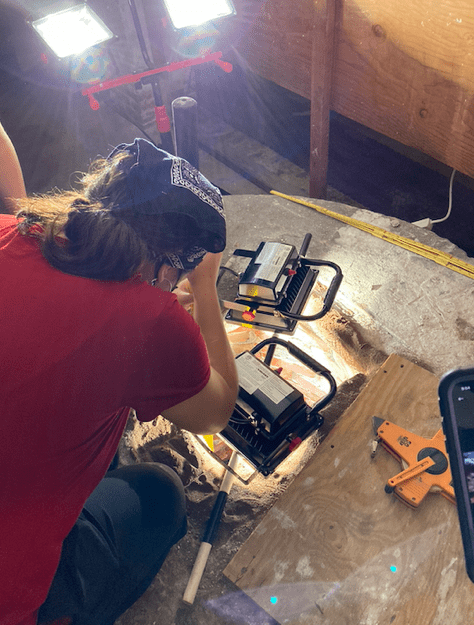
After taking photos of the inside, we set up lights all around the room to do the same for the outside of the well and the surrounding area as we did for the inside. Once again, Nadia took methodical photos with the GoPro, making sure to take pictures at different angles and heights. Following this, Sarah wrapped up her notes and we made sure to double check we did everything correctly and were not missing anything.
After we were done, we made sure to pack up and thank the homeowner for allowing us into their home. Most importantly, as Joe was documenting the site, he was making sure to ask the homeowner questions about the history of the house and any additional details that will be useful when further analyzing the well. At the end, he asked the homeowner if he could have access to the original deeds of the house and any history that the homeowner has compiled. He made sure to let them know that they would get credit for the data and history they collected and reminded all of us that archaeology is teamwork. Everyone, including the community, takes part and does work in archaeological surveys and investigations. In fact, it is often the community who drives the questions of future archaeological inquiry for the City of Boston Archaeology Program.
Learn more about American Conservation Experience.